Materials needed to make two cake postcards:
- 1 large sponge (yellow paints the best)
- Serrated knife
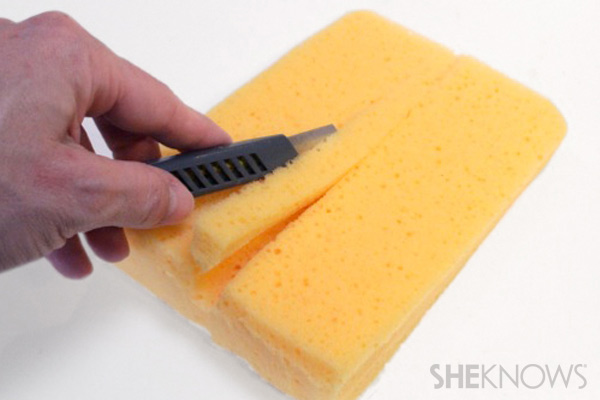
- X-Acto or utility knife
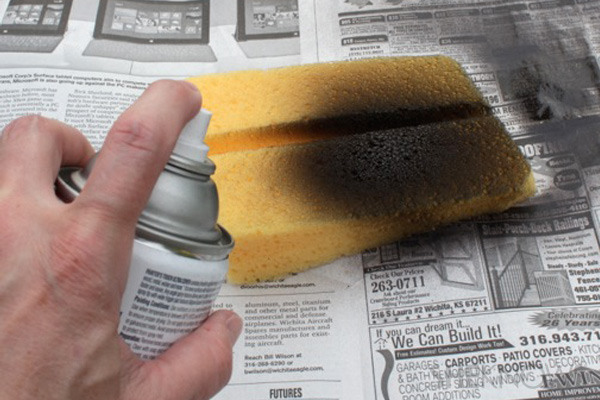
- Spray paint (brown, yellow, pink or white)
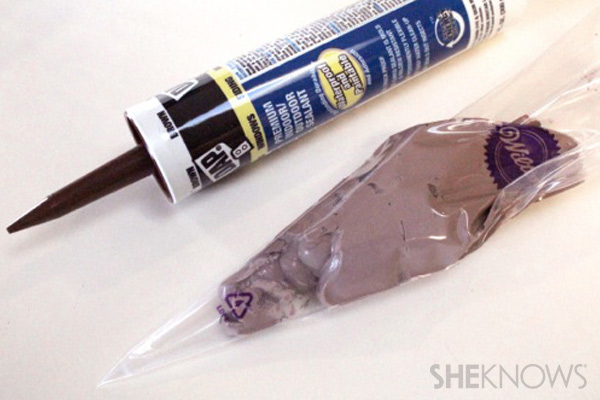
- 1 tube acrylic latex caulk (brown, cream or white)
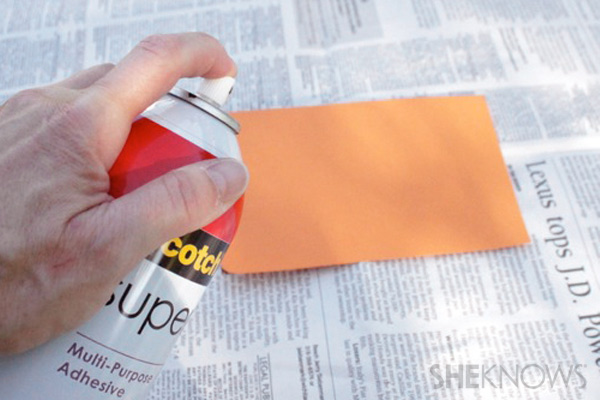
- Spray adhesive (3M Super 77 works great!)
- Cardboard, kraft paper or scrapbook paper
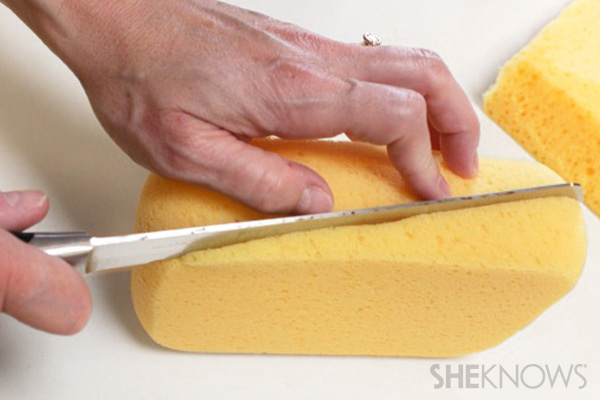
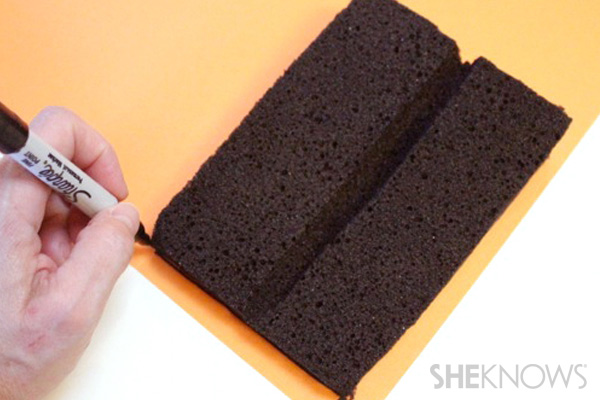
Step 2: Cut a center groove into sponge.
Step 3: Paint the sponge.
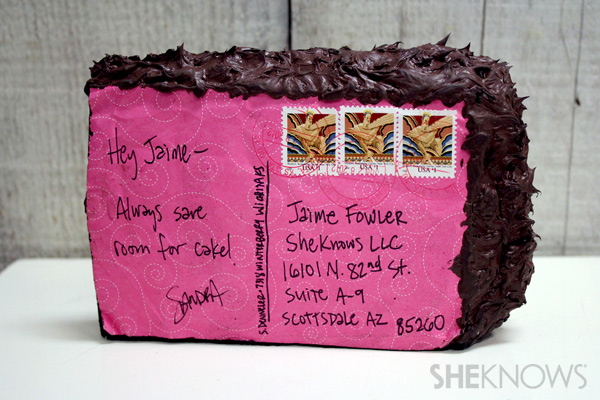
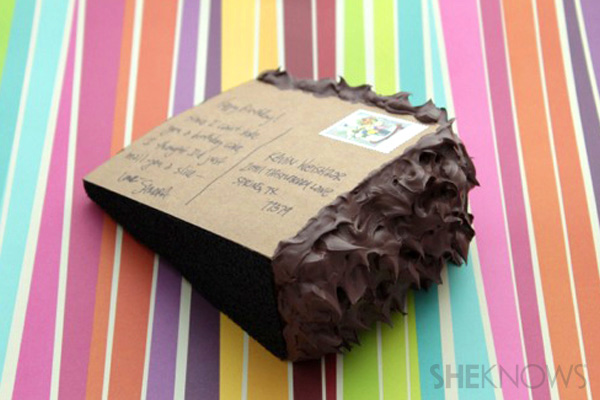
Step 4: Trace the slice of cake.
Step 5: Attach the card.
Step 6: Prep the "icing"
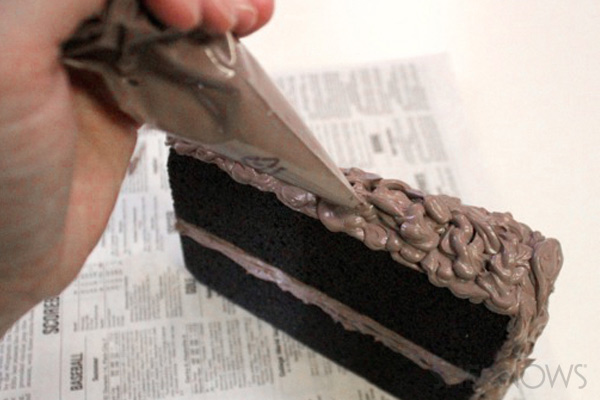
Using a caulking gun and your desired caulk, fill a plastic disposable piping bag with half of the caulk. This should be enough to do one cake wedge. I was able to pipe two cake postcards with one tube of caulk, but I recommend putting only half of the caulk in the bag at a time. Also, I tried decorating my cake wedges using the caulking gun, but it was nearly impossible to control. It's much easier with a piping bag.
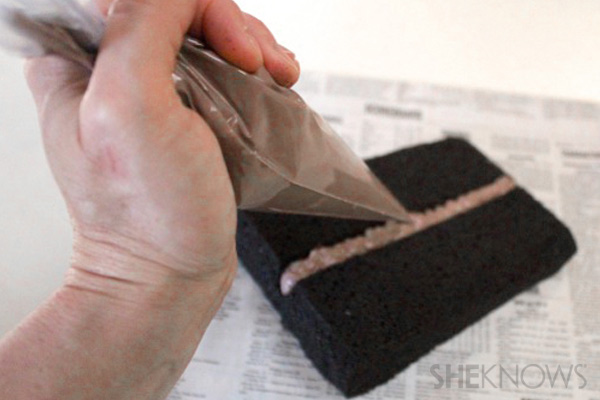
Step 7: Pipe the center of the cake.
Step 8: Pipe the icing on the top and side.
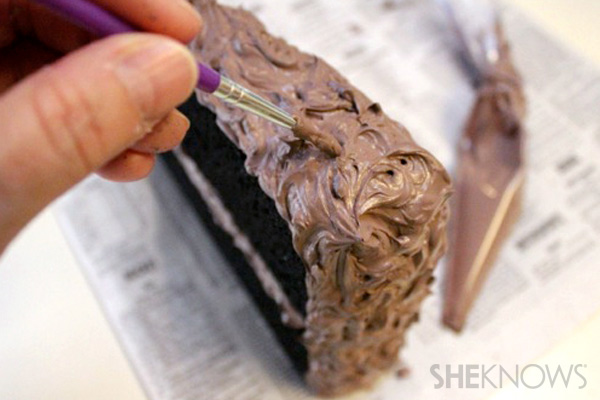
Step 9: Add the swirls.
Allow your cake cards to dry for three to five days. I placed mine on sheet of parchment paper and lifted them up periodically so that the caulk wouldn't dry and adhere to the paper.
No comments:
Post a Comment